Basement Radon Mitigation System: A Homeowner Guide
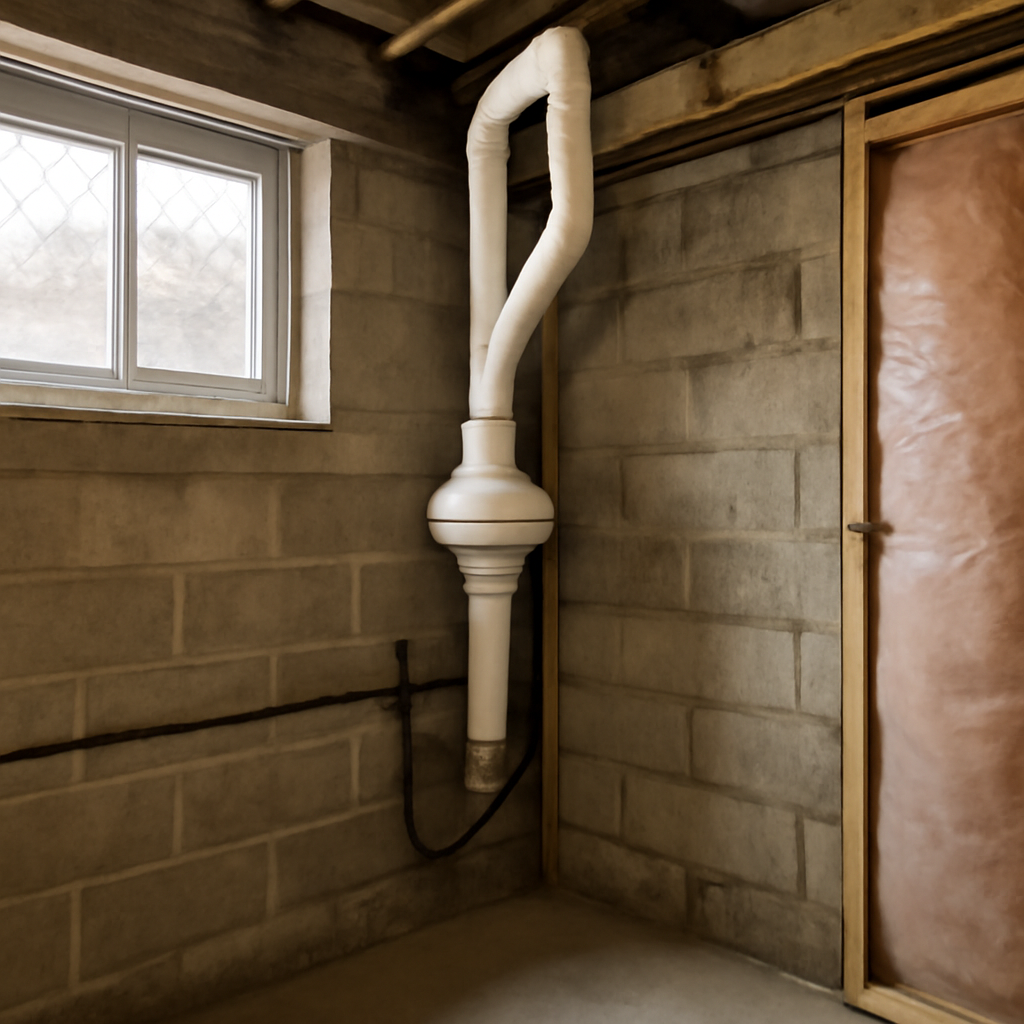
Basements are where radon problems concentrate, because the gas seeps up from the soil and enters a home at its lowest, most ground-contact level. A basement radon mitigation system is the engineered solution: a vent system that intercepts radon beneath the foundation and routes it safely above the roofline before it can build up in living space. For Colorado Front Range homeowners, this matters more than most, since the EPA places much of the state in the highest radon-potential zone. This guide explains how a basement system works, what it costs, and what to expect from installation. It reflects EPA and state guidance current as of 2026; consult a certified mitigation professional for testing and system decisions.
How a basement radon mitigation system works
The most common and effective design is active sub-slab depressurization (ASD). The principle is simple. Radon collects in the soil and crushed rock beneath the concrete slab. An ASD system uses a fan to create slight negative pressure under the slab, so radon is drawn into a pipe and vented outside rather than rising into the basement.
A suction point is created by coring a hole through the basement slab into the aggregate or soil below. A PVC pipe is sealed into that hole and routed, often up through the home or along the exterior, to a fan and then above the roofline. A continuously running inline fan maintains the suction. Because the system pulls radon away before it enters the home, a well-designed ASD setup can dramatically reduce indoor levels. For the full step-by-step, see our guide to radon mitigation installation.
This is fundamentally different from simply ventilating the basement. Sealing cracks and adding ventilation helps a little, but it rarely solves a real radon problem on its own. ASD addresses the source.
The “active” in active sub-slab depressurization refers to the fan. A passive system relies only on the natural stack effect of a vertical pipe to draw radon out, which is sometimes built into new construction but is usually too weak to reliably reduce elevated levels in an existing home. Adding a fan turns a passive pipe into an active system that maintains consistent suction regardless of weather or season. For basements with significant radon, the active version is the standard, and many passive systems are upgraded with a fan when post-construction testing reveals they are not keeping levels low enough on their own.
Why basements need mitigation most
Radon enters a home through the path of least resistance from the soil, and the basement is at the front line. Cracks in the slab, gaps around pipe penetrations, sump pits, floor drains, and the joint where the floor meets the wall all provide entry points. Because the basement is enclosed and often poorly ventilated, radon accumulates there to higher concentrations than upper floors.
That is why basement testing is the standard. The EPA recommends action when radon reaches 4 picocuries per liter (pCi/L) or higher in the lowest livable level. Even finished, frequently used basements, common in Colorado homes, can hold elevated levels that warrant mitigation. If you have not yet measured your home, start there; the radon testing guide for Front Range homeowners explains how, and our basement radon level chart shows what the numbers mean.
The installation process
A professional installation typically takes a few hours to a day, depending on the home’s layout. The general sequence looks like this:
- Diagnostic assessment. The installer evaluates the foundation, identifies the best suction point, and may perform diagnostic tests to locate the most effective location.
- Suction point and piping. A hole is cored through the slab, and PVC pipe is sealed in and routed toward the exterior or up through the home.
- Fan installation. An inline radon fan is installed in an unconditioned space such as an attic, garage, or outside, never in the living space, so any leak does not return radon indoors.
- Sealing and discharge. Slab cracks, the sump, and penetrations are sealed to improve performance, and the pipe discharges above the roofline away from windows.
- Monitoring and verification. A manometer is installed to show the system is running, and a post-mitigation radon test confirms levels have dropped.
- Walkthrough and labeling. The installer reviews the finished system with you, labels the components, and explains how to read the manometer so you can spot a future fault.
That final post-installation test is essential. It is the only way to prove the system actually brought your radon below the action level. Reputable installers include it.
Finished versus unfinished basements
The state of your basement shapes the installation. In an unfinished basement, the slab is exposed, the foundation walls are accessible, and the installer has clear room to choose a suction point and route the pipe. These jobs tend to be simpler and less expensive, since there is little to work around and the components can be left visible.
A finished basement complicates matters. Drywall, flooring, and built-in features can hide the slab and obstruct pipe routing, so the installer may need to run the pipe through a closet, a utility chase, or up an exterior wall to reach the roofline discreetly. This adds labor and cost, and it requires more planning to keep the finished space intact. It also makes the choice of suction point more important, since the installer wants to avoid opening up finished areas. Many Colorado homes have finished, frequently used basements, which is exactly why mitigation matters there, but it does mean homeowners should expect a more involved installation than a bare-slab basement would require. A good installer will walk the space first and explain the routing plan before any work begins.
What a basement system costs
Industry estimates commonly place a typical residential radon mitigation system in the range of roughly $800 to $2,500, with most basement installations landing in the middle. Cost depends on the foundation type, the home’s layout, pipe routing complexity, the number of suction points needed, and local labor rates.
Simple installations with a single suction point and a short, straightforward pipe run are cheaper. Homes with large slabs, multiple foundation sections, finished basements that complicate routing, or crawl space components cost more. Operating cost is modest: the fan runs continuously and uses a small amount of electricity, plus a slight heating or cooling penalty from the air it moves. For a detailed cost breakdown, see our guide on radon mitigation system cost.
Several factors can push a quote higher. A home that needs more than one suction point, common where the slab is divided by interior footings, requires additional coring and piping. Sump pits may need to be sealed and incorporated into the system. Crawl space areas often call for sub-membrane depressurization, a related technique that adds a sealed plastic membrane over the soil. And aesthetic preferences, such as routing the pipe inside the home rather than along an exterior wall, can add labor. When comparing bids, make sure each covers the same number of suction points, the same routing approach, and a post-installation test, so you are weighing equivalent scopes rather than headline prices.
Maintaining the system
A radon mitigation system is largely set-and-forget, but it is not zero-maintenance. The fan is the main wear component and typically lasts several years to over a decade before needing replacement. Check the manometer periodically; if the liquid levels are even, the system has lost suction and needs attention.
Retest your home’s radon every two years, and after any major renovation, foundation work, or fan replacement. Radon levels can shift as a house settles or as soil conditions change, so a system that worked initially should still be verified over time. Keep the fan powered at all times, since switching it off lets radon return quickly. If you ever notice the fan has stopped or grown noisy, contact your mitigation professional.
A continuous radon monitor left in the basement makes this oversight easier, alerting you to any climb in levels long before a scheduled retest would. Pairing a mitigation system with ongoing monitoring is a sensible belt-and-suspenders approach, especially in high-radon areas. The manometer tells you the system is pulling suction, while a monitor confirms the result that suction is supposed to produce: indoor radon held safely below the action level. Together they give you confidence that the system is doing its job year-round.
DIY versus professional installation
Some experienced homeowners install their own systems, and our overview of DIY radon mitigation covers what that involves. The work requires coring concrete, sizing the fan correctly, routing and sealing pipe to code, and verifying results with a follow-up test. Mistakes in suction point placement or fan sizing can leave levels dangerously high while appearing to work.
For most homeowners, a certified mitigation contractor is the safer choice. They diagnose the foundation, guarantee the system reaches the target level, and follow EPA and state installation standards. In Colorado, where radon potential is high statewide, getting the system right the first time is worth the professional fee.
When choosing a contractor, look for certification through a recognized radon proficiency program and ask for references and a written guarantee that the system will bring levels below 4 pCi/L. A reputable installer performs diagnostic testing before quoting, explains the routing and fan placement, and includes a post-installation radon test in the price. Get more than one bid, and be cautious of any quote that omits the confirmation test or cannot explain how the suction point was chosen. The cheapest installation is no bargain if it fails to reduce your radon, and verifying the contractor’s credentials up front avoids that outcome. A well-installed system is quiet, unobtrusive, and effective for years, so it pays to start with a professional who treats the verification step as non-negotiable. Many installers also offer a workmanship guarantee, committing to adjust or upgrade the system, by adding a suction point or a stronger fan, if the post-installation test does not clear the action level, which is exactly the kind of accountability worth paying for on a health-related project. A basement radon system is a one-time investment that protects your household for years, so spending a little more for a properly diagnosed, verified, and guaranteed installation is money well placed. With the source addressed beneath the slab, the fan running continuously, and a post-installation test confirming the result, a basement radon system reliably holds indoor levels below the action threshold and lets you stop worrying about an invisible gas you can finally see measured and managed.
References
- Consumer’s Guide to Radon Reduction — U.S. EPA
- Health Risk of Radon — U.S. EPA
- Radon in Colorado — Colorado Department of Public Health and Environment
- About Radon and Your Health — Centers for Disease Control and Prevention
Front Range homeowners with elevated basement radon can connect with a vetted local mitigation professional by reaching out through our contact page.
Radon mitigation fans & parts
If a sub-slab depressurization system is the fix, the inline fan is the heart of it. Match the fan to your soil and pipe diameter — or have a certified installer size it.
| Product | Why | Buy |
|---|---|---|
 RadonAway RP145 Inline Fan RadonAway RP145 Inline Fan | Common 4-in. SSD workhorse fan. | Amazon — $152.00 |
 Fantech Rn2 Radon Fan Fantech Rn2 Radon Fan | Quiet operation; energy-efficient. | Amazon — $165.24 |
 Radon U-Tube Manometer Radon U-Tube Manometer | Confirms the system is pulling suction. | Amazon — $13.95 |