Radon System Installation Cost: A Clear Guide
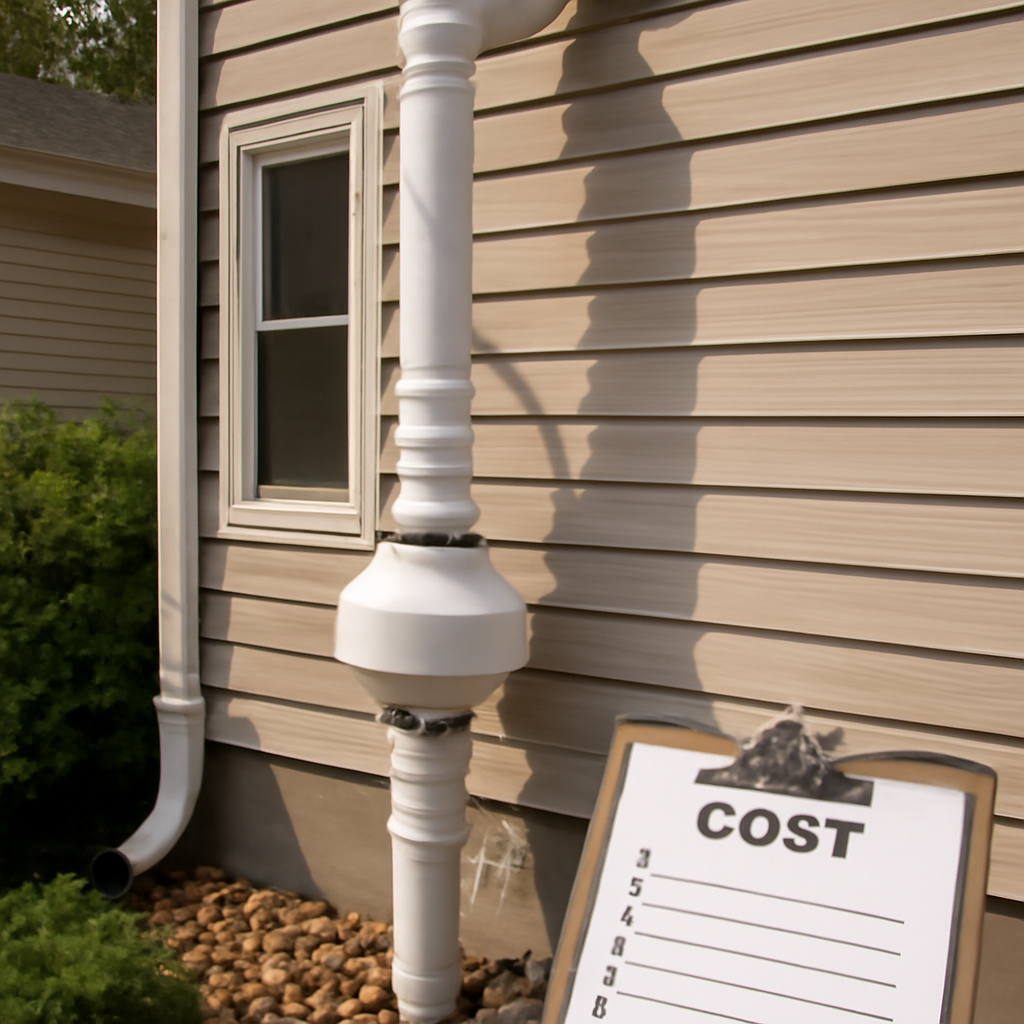
Once a test confirms radon above the EPA’s 4.0 pCi/L action level, the next question is almost always about money. Radon system installation cost is more predictable than most home repairs, because the standard fix, sub-slab depressurization, uses the same components in nearly every house. What moves the price is the building itself: the foundation type, how many suction points the soil needs, and where the vent pipe has to travel. This guide summarizes EPA and CDPHE guidance current as of 2026; it is educational and not a substitute for a certified mitigation contractor or medical advice from your physician.
Typical Radon System Installation Cost
For a standard single-family home, professional installation generally runs between $800 and $2,500, with most Front Range jobs landing in the $1,200 to $1,800 range. A simple slab-on-grade or basement home with one suction point and a short pipe run sits at the low end. Larger homes, crawl spaces, multiple foundation sections, or concealed interior routing push toward the top.
That range buys a system that typically reduces radon by 80 to 99 percent, bringing most homes well below the action level. Set against radon’s status as the second leading cause of lung cancer, the cost is modest. For the broader decision context, our hub on radon testing for Colorado homeowners explains when installation becomes necessary, and why most homeowners view it as a one-time investment in the home’s long-term safety.
What Drives the Cost Up or Down
Four variables explain almost every difference between quotes, and knowing them lets you compare bids on a fair basis.
Foundation Type
A basement or slab home is cheapest, since one suction point under the slab usually does the job. A crawl space costs more because it requires a sealed vapor barrier plus depressurization beneath it. Homes mixing foundation types may need more than one system. Our guide to radon mitigation in a crawl space explains why those installations run higher.
Number of Suction Points
Most homes need a single suction point, but large floor plans or poor sub-slab airflow can require additional ones, each adding labor and material. A diagnostic test before installation tells the contractor how many points the soil under your slab actually requires.
Pipe Routing
An exterior run mounted on the outside wall is cheaper than an interior run hidden in chases and exiting through the roof. Many homeowners pay extra for the cleaner interior appearance, which is a cosmetic choice rather than a performance one.
Fan and Components
The inline fan is sized to the home’s needs; higher-suction fans for tight soils cost more. Our explainer on the radon system fan covers how sizing affects both price and performance, and why an undersized fan is a false economy.
What Should Be Included in the Quote
A complete installation quote bundles every step needed to reach a safe, verified result.
- Coring the suction point and excavating the collection pit
- PVC piping and all fittings
- An inline fan, properly sized
- A manometer pressure gauge
- Sealing of accessible foundation cracks and the sump pit
- A post-mitigation radon test to confirm the system works
The post-mitigation test is the line item homeowners most often overlook, yet it is the proof the system actually lowered radon. A quote that omits it is incomplete, no matter how low the headline price. Ask each contractor to put the included items in writing so you are comparing equivalent scopes rather than just numbers.
Operating and Long-Term Costs
After installation, ongoing cost is small. The fan runs continuously on electricity comparable to a low-wattage bulb, adding a modest amount to the monthly power bill, plus a slight bump in heating and cooling load. Radon fans last roughly 5 to 10 years; replacement runs a few hundred dollars including labor. Budgeting for one fan replacement over the life of the system is realistic, and a failed fan is a simple swap rather than a full reinstall.
DIY vs. Professional Installation
Some homeowners consider a DIY kit to save money. The math rarely favors it. A DIY system might cost less in parts, but improper fan sizing, a poorly placed suction point, or a vent terminating near a window can leave radon high or pull gas back indoors, forcing a professional redo. Our overview of how to remove radon from your home explains why the depressurization design is harder than it looks.
Professional installation also delivers a calibrated post-mitigation test and documentation that buyers and lenders recognize, value a DIY job cannot provide. When a home sells, that paper trail can matter as much as the system itself.
Regional and Home-Specific Factors
Local conditions nudge the cost within the typical band. Front Range homes with heavy clay soils may need a more powerful fan, which raises the price slightly. Finished basements common across Douglas and Arapahoe counties can complicate pipe routing, since the installer must find a path that does not disrupt living space. Older homes with cracked or porous foundations need more sealing work. None of these alone pushes a project far out of range, but together they explain why two seemingly similar homes can receive different quotes.
How to Avoid Overpaying
Cost control comes from comparison and clarity, not from cutting safety. Get two or three written quotes from certified contractors. Confirm each includes the post-mitigation test and crack sealing. Choose an exterior pipe run if appearance is not a concern. Ask whether any local utility or health-department rebate applies. And be skeptical of a bid far below the others, since the gap often hides a missing confirmation test or an undersized fan that will not reduce radon enough.
Interior vs. Exterior Routing and Its Price Impact
One of the clearest cost levers a homeowner controls is pipe routing. An exterior installation runs the pipe up the outside wall of the house to a termination above the roofline, which is faster to install and therefore cheaper. The trade-off is appearance: a visible white pipe on the exterior, and in very cold climates a small risk of condensation freezing if not designed well.
An interior installation hides the pipe inside closets, chases, or the garage and exits through the roof, producing a cleaner look but requiring more labor and finish work, which raises the price. Neither option performs better at reducing radon; the choice is largely cosmetic. A homeowner on a budget can save by accepting an exterior run, while one prioritizing curb appeal pays a premium for concealment. Understanding this lets you decide where to spend rather than assuming the higher quote is simply better.
It is worth asking each contractor to quote both options so you can see the actual difference in your home. In some layouts the gap is small, because a short interior chase already exists; in others, with no easy interior path, concealment adds significant labor. Seeing the two numbers side by side turns an abstract preference into a concrete, informed choice, and it can reveal that the cleaner-looking option costs less than you assumed, or that the savings from an exterior run are larger than expected. Either way, the decision becomes yours to make with full information rather than the contractor’s default, and you avoid paying a concealment premium you did not knowingly and deliberately choose to accept.
Cost in the Context of the Whole Radon Process
Installation cost is one piece of a larger sequence, and seeing the whole sequence puts the number in perspective. First comes testing, which is inexpensive, a free or low-cost kit, or a modest professional measurement. If the result is elevated, the installation cost follows, which is the largest single expense. After that comes the small ongoing cost of running and maintaining the system.
Viewed this way, the installation is a one-time investment that converts a documented hazard into a documented protection. The alternative, doing nothing, carries no dollar cost upfront but a real health cost over time. Most homeowners who understand the sequence conclude that the installation price is reasonable for what it accomplishes, especially when spread across the many years the system will protect the household. The cost is not an open-ended commitment but a defined, mostly front-loaded expense.
How Contractors Arrive at a Price
Behind the quoted number is a fairly consistent set of inputs. A contractor estimates labor for coring the slab, excavating the suction pit, running and sealing the pipe, mounting the fan, and sealing foundation openings, typically a single day’s work for a crew. To that they add materials, mainly PVC pipe and fittings, the fan, and the manometer, and the cost of the post-mitigation test. Overhead, insurance, and warranty support round out the figure.
The reason quotes vary even for similar homes is that these inputs scale with the specifics. A longer pipe run uses more material. A second suction point doubles part of the labor. A higher-suction fan for tight soil costs more than a standard unit. When you understand that the price is built from these components, an itemized quote becomes easy to read, and an unusually low or high number prompts the right follow-up question about which input is driving it.
One-Time vs. Lifetime Cost
It is useful to separate the upfront installation from the lifetime cost of ownership. The installation is the large, one-time figure in the $800 to $2,500 range. The lifetime cost adds the continuous fan electricity, a slight HVAC impact, and a fan replacement every 5 to 10 years at a few hundred dollars each.
Spread over the decades a system runs, the ongoing cost is small, often less than many household subscriptions. Framing it this way helps homeowners see that the headline installation price is the bulk of what they will ever spend, and that the system is not an open-ended expense. For a hazard that carries serious health consequences, that is a reasonable lifetime cost for durable protection.
Cost Differences by Foundation in Detail
Because foundation type is the biggest single cost driver, it is worth a closer look. A poured-slab or full-basement home with good sub-slab gravel is the ideal, cheapest case, since one well-placed suction point can serve the whole footprint. A crawl space adds the cost of laying and sealing a heavy vapor barrier across the soil before depressurizing beneath it.
Homes with a combination of foundation types, common in additions and remodels, can require separate treatment for each section, which is the most frequent reason a quote climbs toward the top of the range. Block-wall foundations may need extra sealing because the hollow cores can channel soil gas. Knowing how your home is built sets a realistic expectation before the first contractor even visits.
When to Call a Professional
Radon mitigation is best left to a state-certified contractor. The design choices, fan sizing, suction-point placement, and vent termination, determine whether the system works, and getting them wrong is both dangerous and expensive to correct. A certified contractor provides a written, itemized quote, installs to code, and supplies the post-mitigation test that documents success. For Front Range homeowners, that documentation supports both peace of mind and resale value.
References
- A Consumer’s Guide to Radon Reduction — U.S. Environmental Protection Agency
- Radon Mitigation and Costs in Colorado — Colorado Department of Public Health and Environment
- Fixing Radon in Your Home — American Lung Association
Front Range homeowners comparing radon installation quotes and wanting a trustworthy local bid can get in touch with a vetted inspector through our contact page before signing.